CROWLEY'S
Granite & Quartz
How we build your shower
Every stage of a shower demolition and installation, in the order we do it, from the permit to the final cleaning. Demolition through glass runs about thirteen working days.
-
01
Preparation
Day 1
- We handle city permits and inspections if needed. For most showers they are not required.
- Protect home flooring with Ram Board throughout the workspace.
-
02
Demolition
Day 2
- Remove and dispose of old shower walls, floor, and sheetrock.
- Clean, organized demolition process.
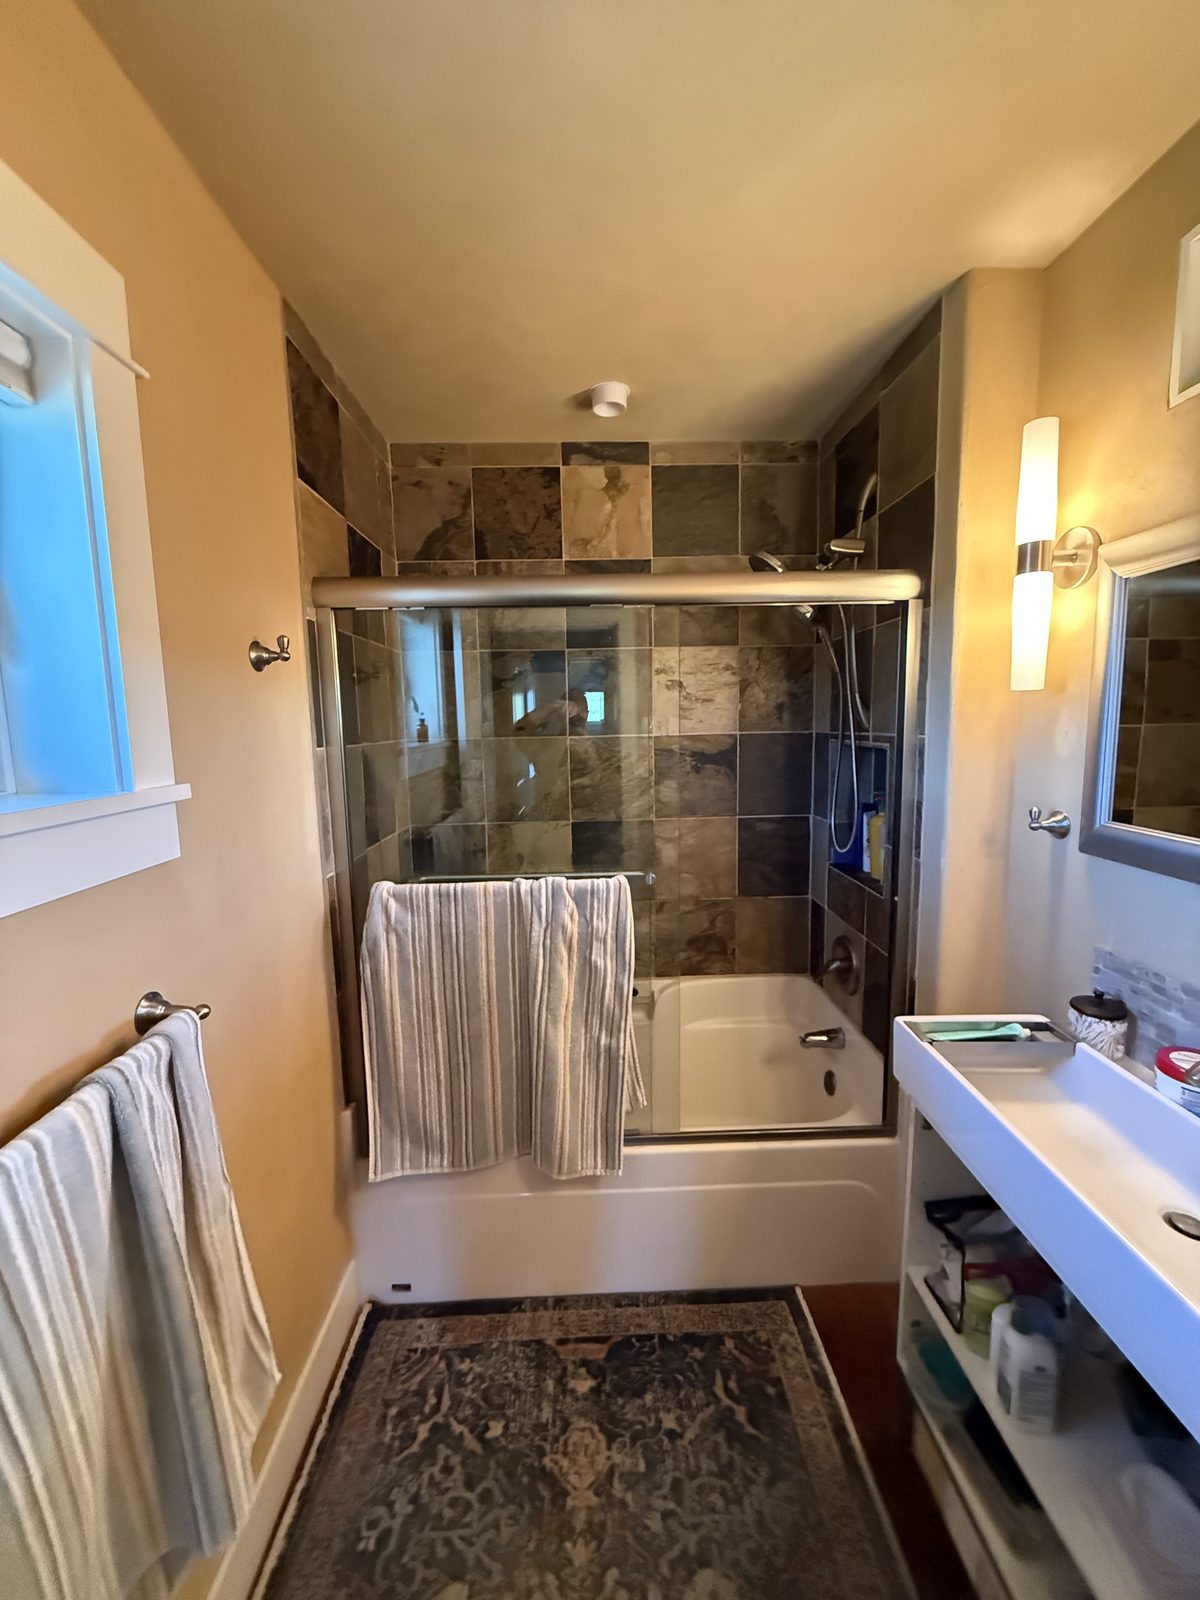
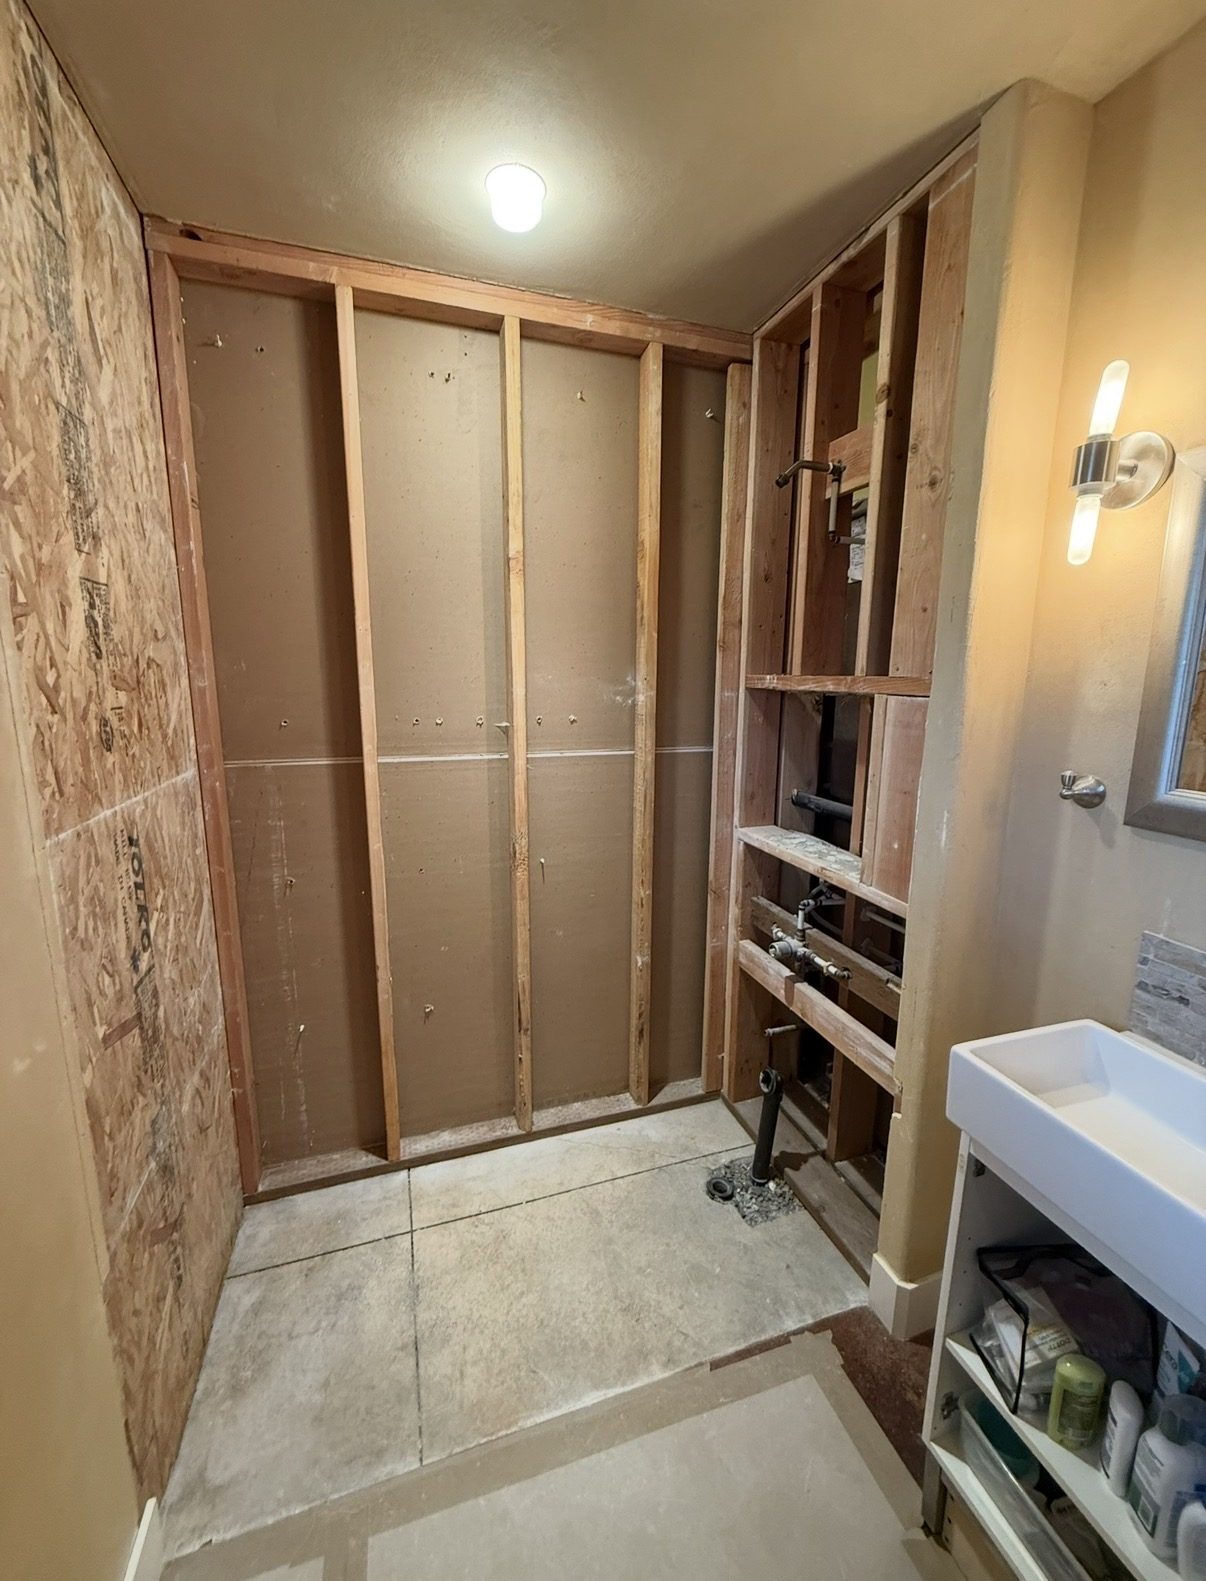
The shower we started with, and the same wall stripped to the studs with the old drain and valve exposed. -
03
Framing adjustments
Day 3
- Modify and reinforce existing framing.
- Remove the old curb and lower the floor for a curbless shower design.
- Add solid wood blocking between the studs at grab bar heights, so bars anchor into structure rather than board. Worth adding even if you want the bars later.
- Planning an exhaust fan, new lighting, or a moved switch? That wiring happens while the walls are open, so tell us before demolition.
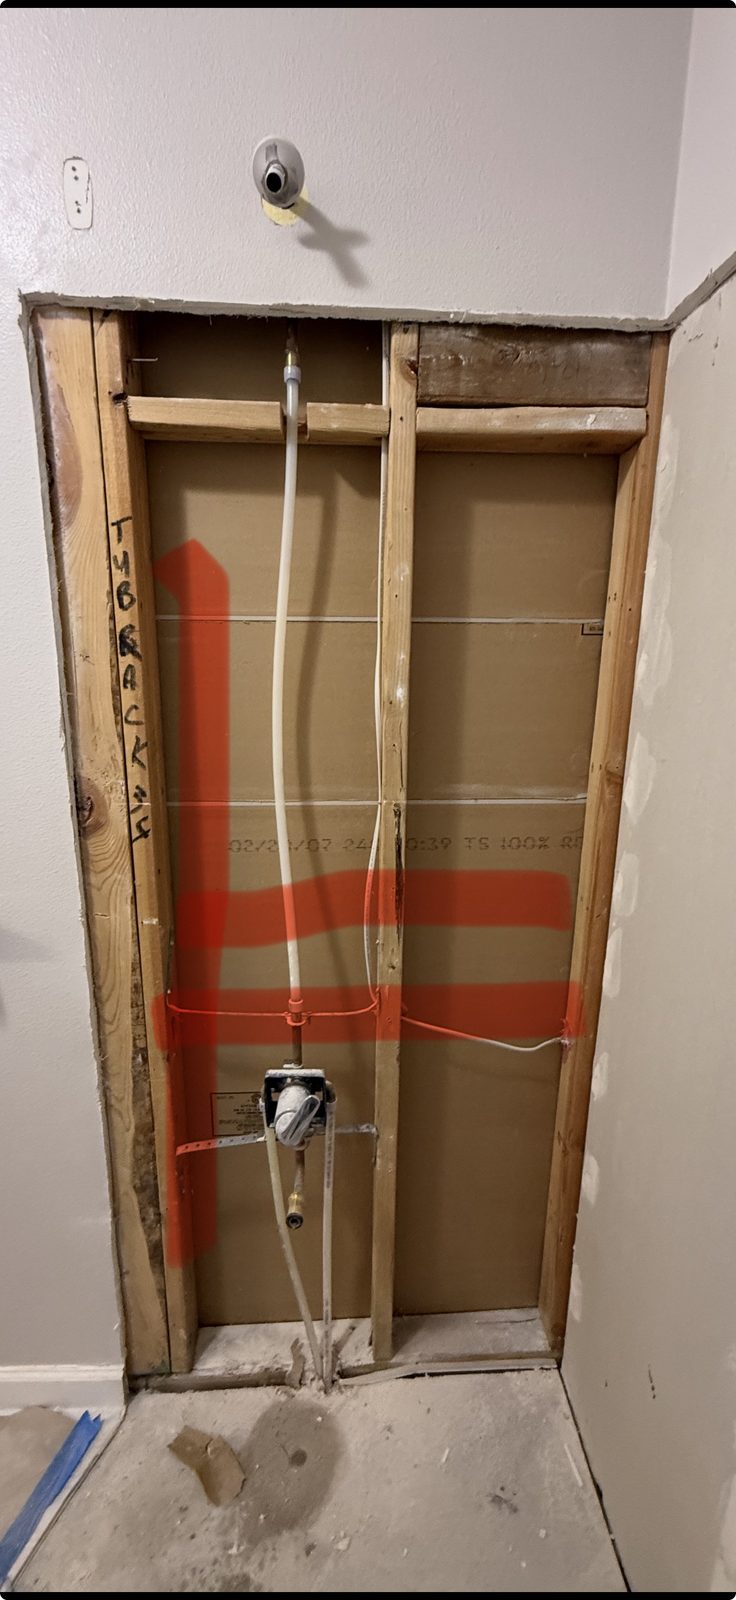
Red lines mark where additional 2x4s go in: backing for the shower valve, and more support for the grab bar. -
04
Plumbing upgrades
Day 4
- Adjust plumbing drain and shower valve for correct height, depth, and alignment.
- Perform required shower pan inspection (silver circular drain).
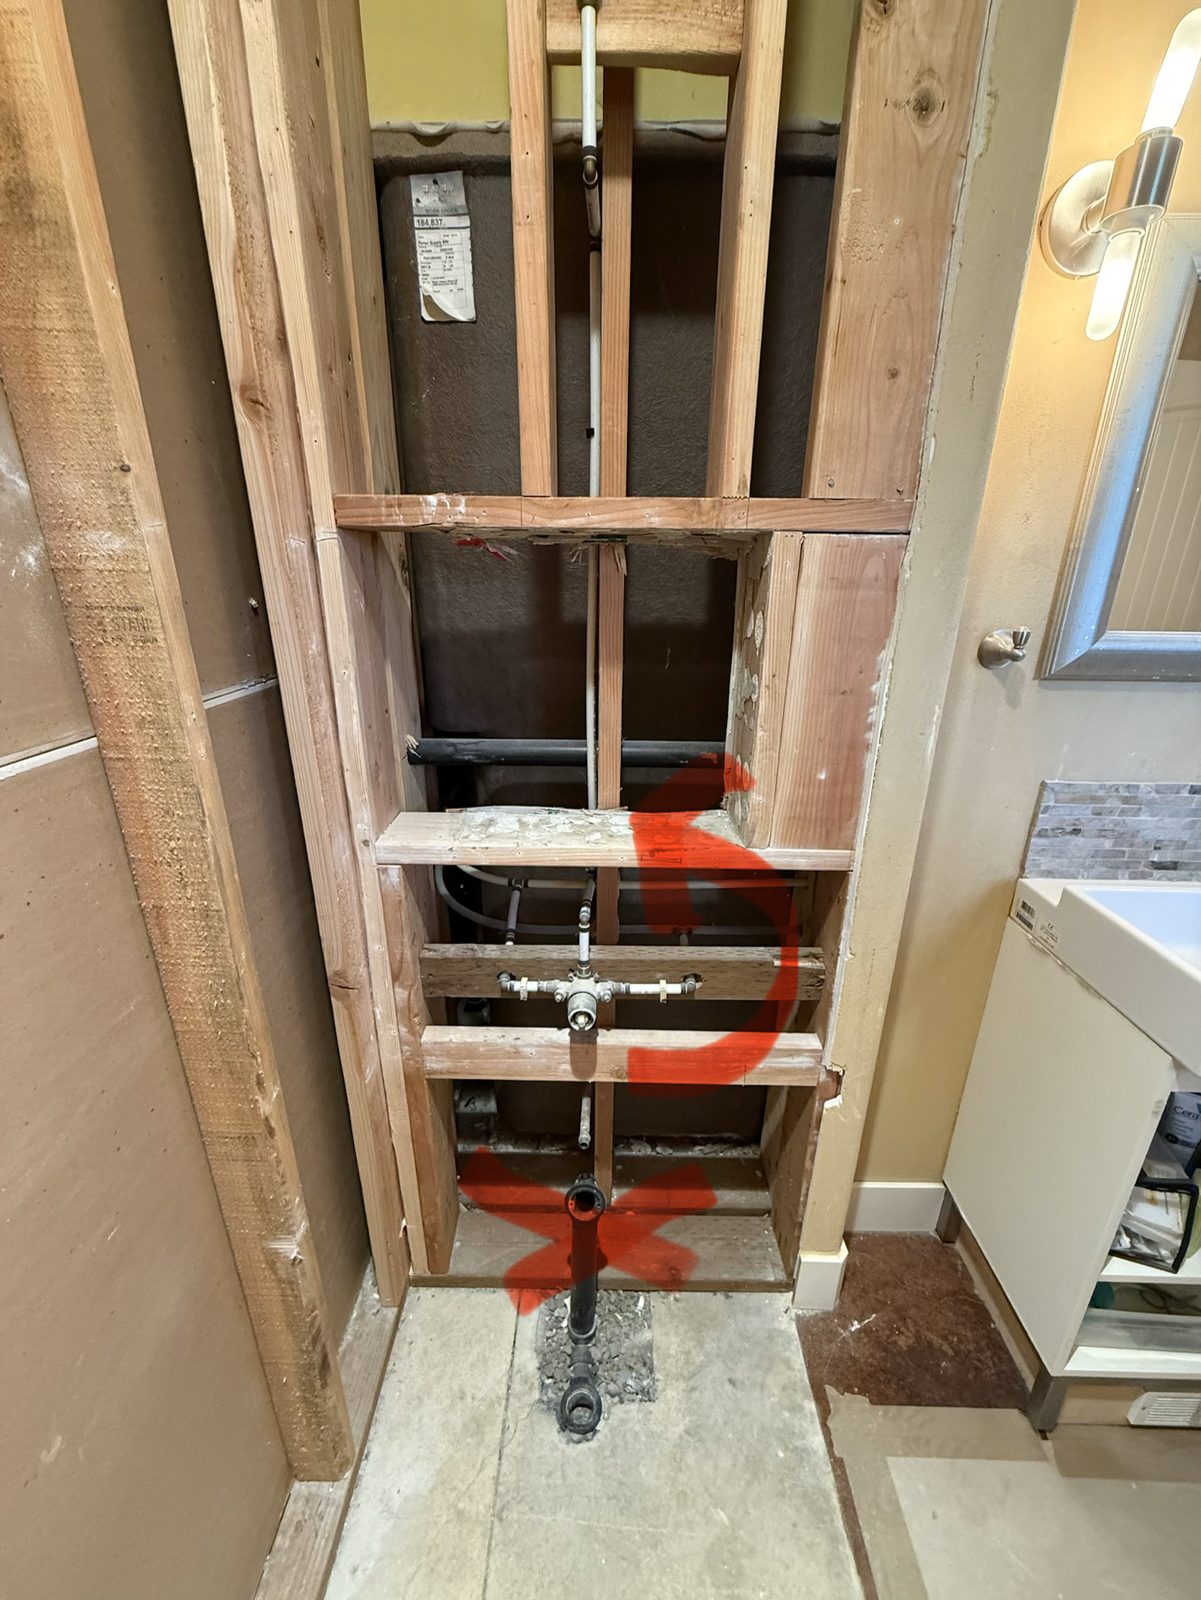
This bathroom had a tub, so the valve sits at tub height. The arrow marks where it moves up for a walk-in shower, and the cross marks the old tub plumbing coming out. -
05
Wall insulation
Day 5
- Properly insulate shower walls for moisture control and comfort, if needed.
- Not every shower needs it. Skipping it saves a project day.
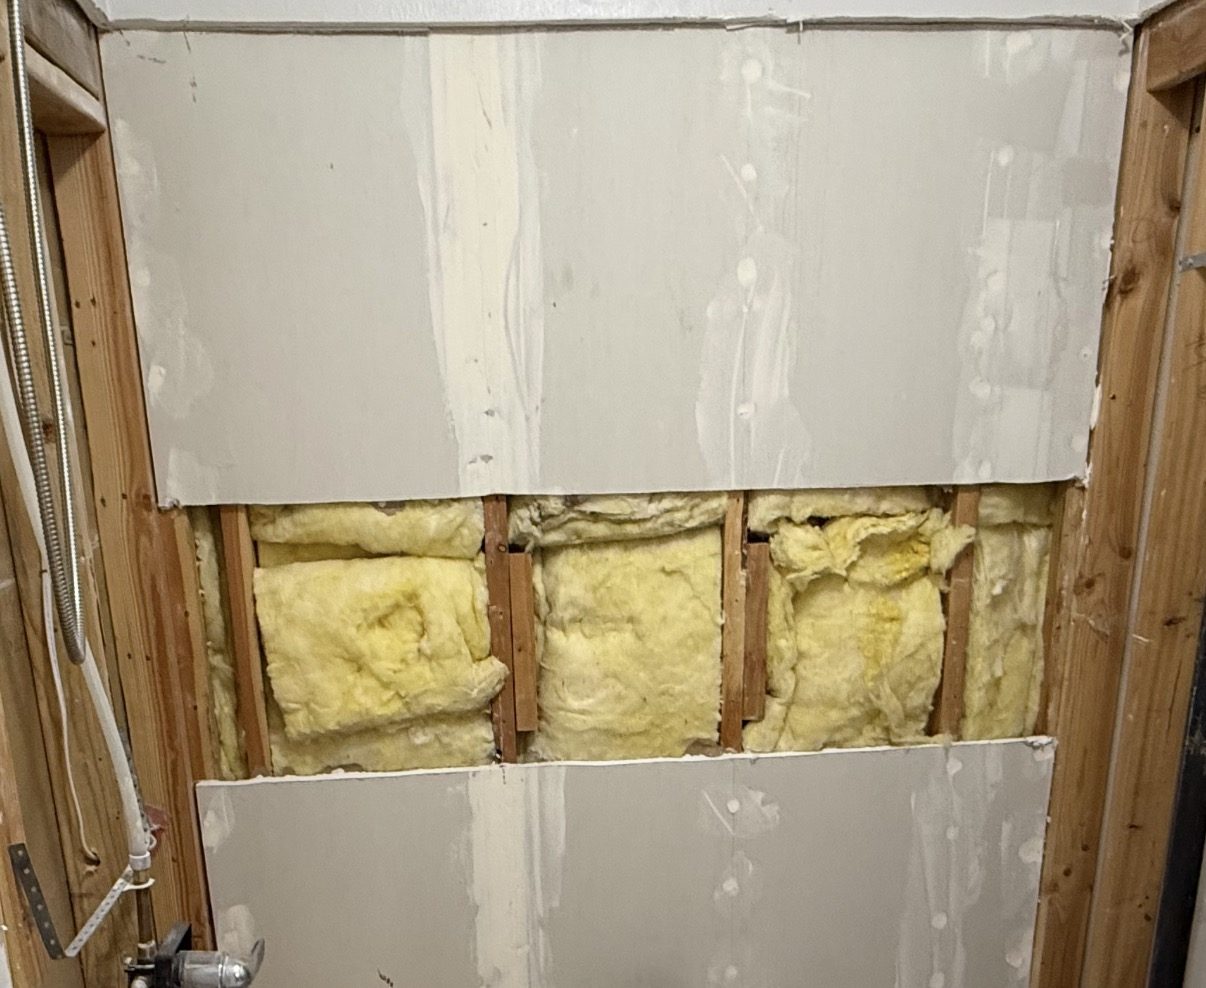
Insulation in the stud bays, and solid blocking added between the studs so a grab bar can be mounted later into wood rather than into board. -
06
Waterproof system
Day 6
- Install waterproof board on every wall and the base. Depending on the project we use Hydro Block or Schluter KERDI-BOARD.
- Seal all seams and connections for long-lasting protection.
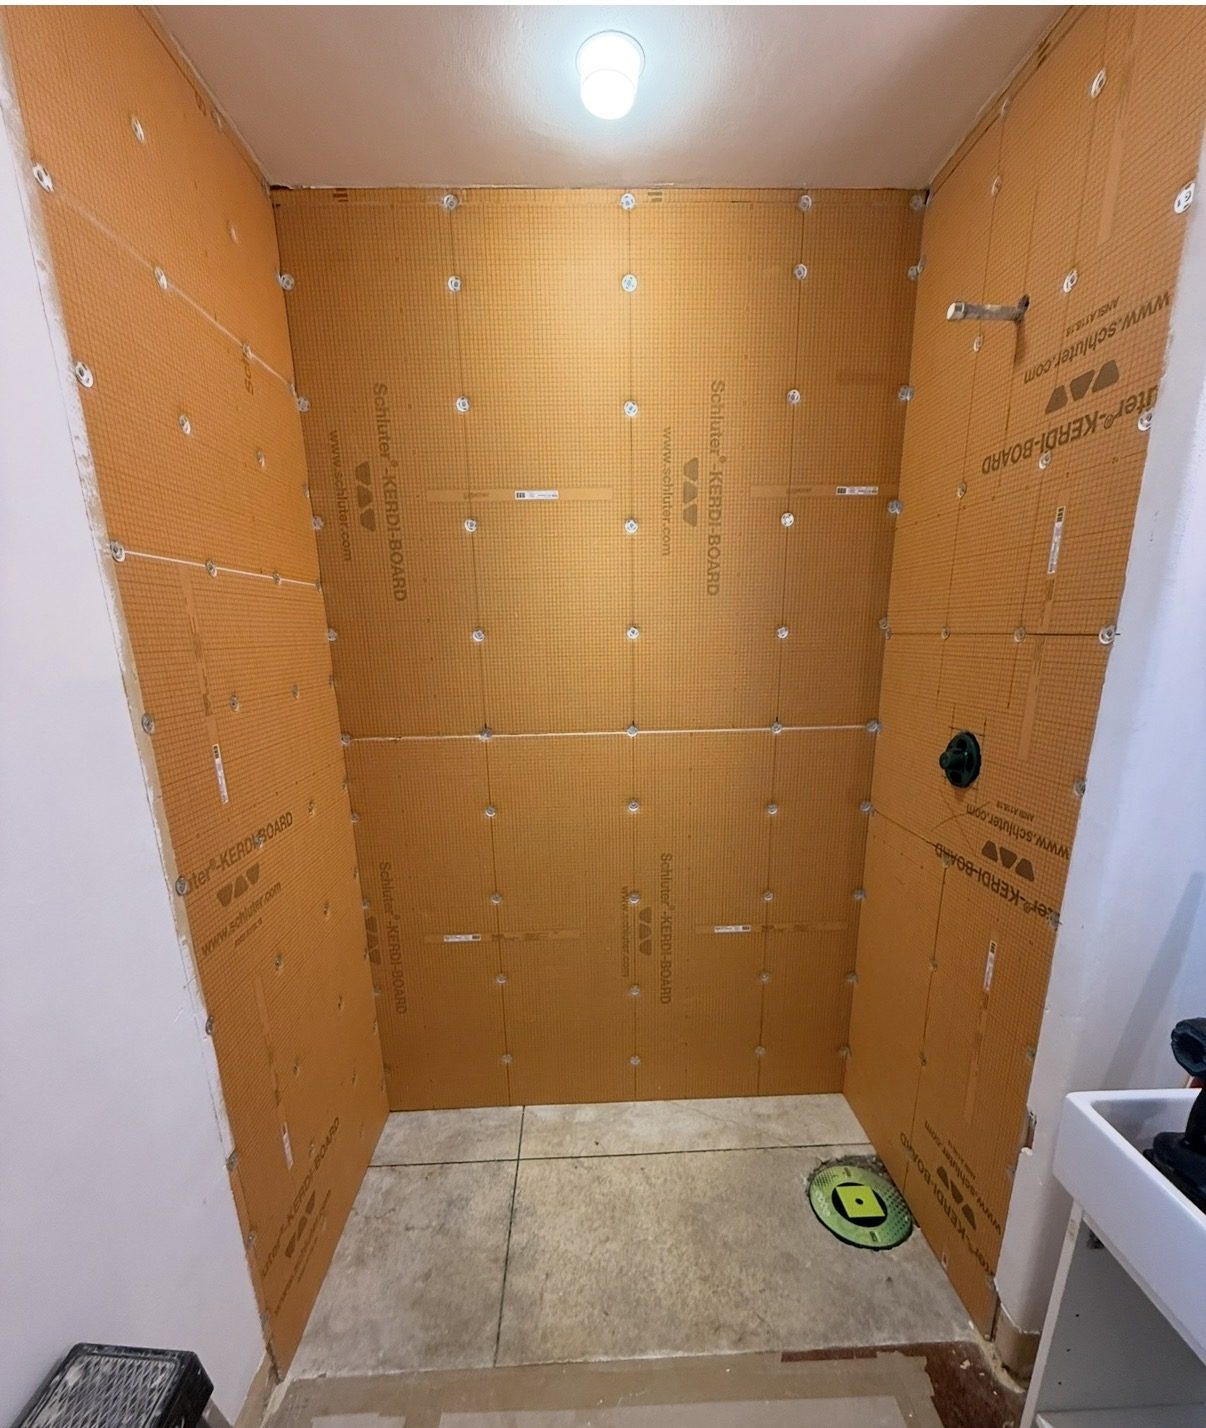
Waterproof board over every wall, fastened and sealed at each seam and screw. Schluter board shown. -
07
Base template
Day 7
- Template the shower base on site, once the waterproofing is complete.
- The base is cut to the template, not to a drawing, so it fits the opening as built.
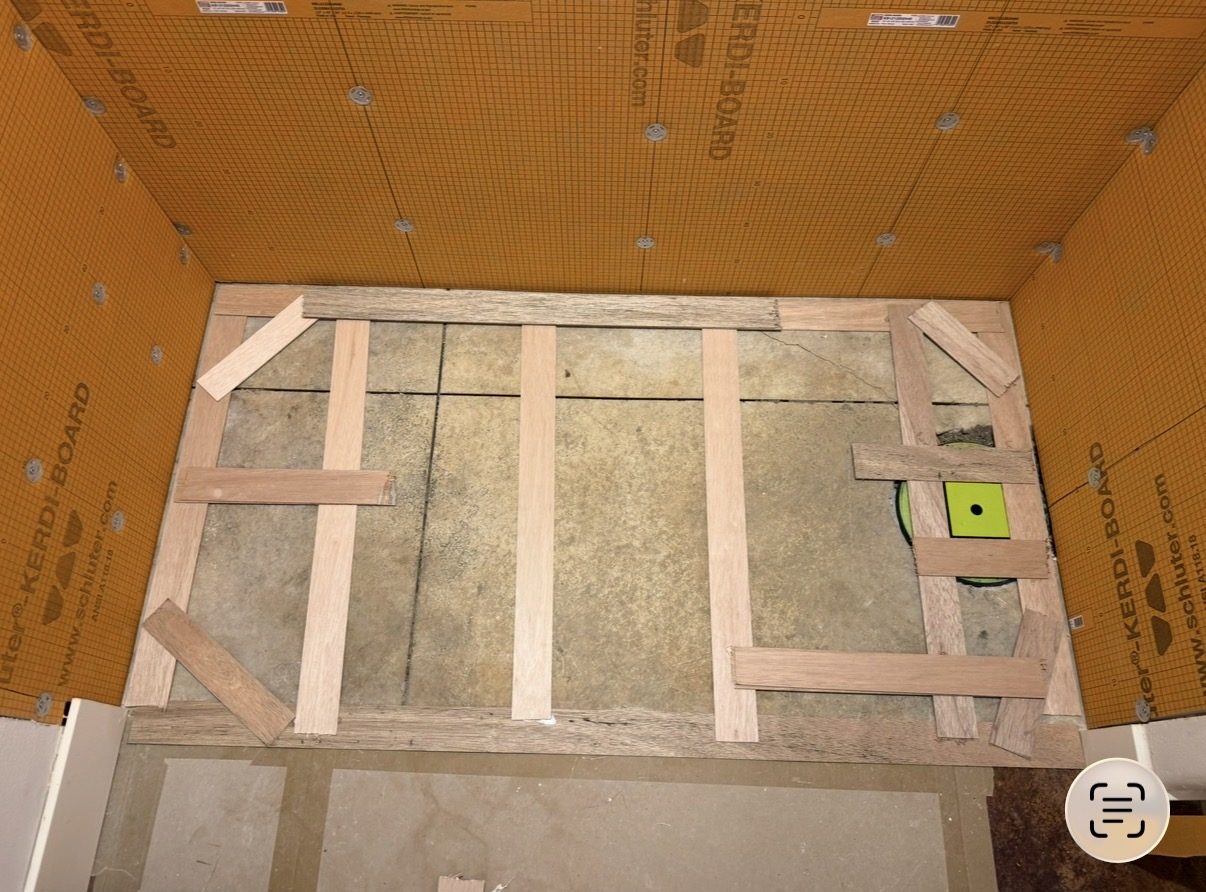
The base template, built on site inside the waterproofed enclosure. -
08
Stone fabrication & installation
Days 8 to 13
- Fabricate and install the shower base first.
- With the base set, template the walls, then fabricate and install the wall panels.
- The base is either tile or solid stone. A solid stone base adds 2 to 3 days for fabrication and installation.
- Exposed panel edges are capped with Schluter edge trim, matched to your hardware finish, so every visible edge ends in a clean metal profile instead of a raw cut.
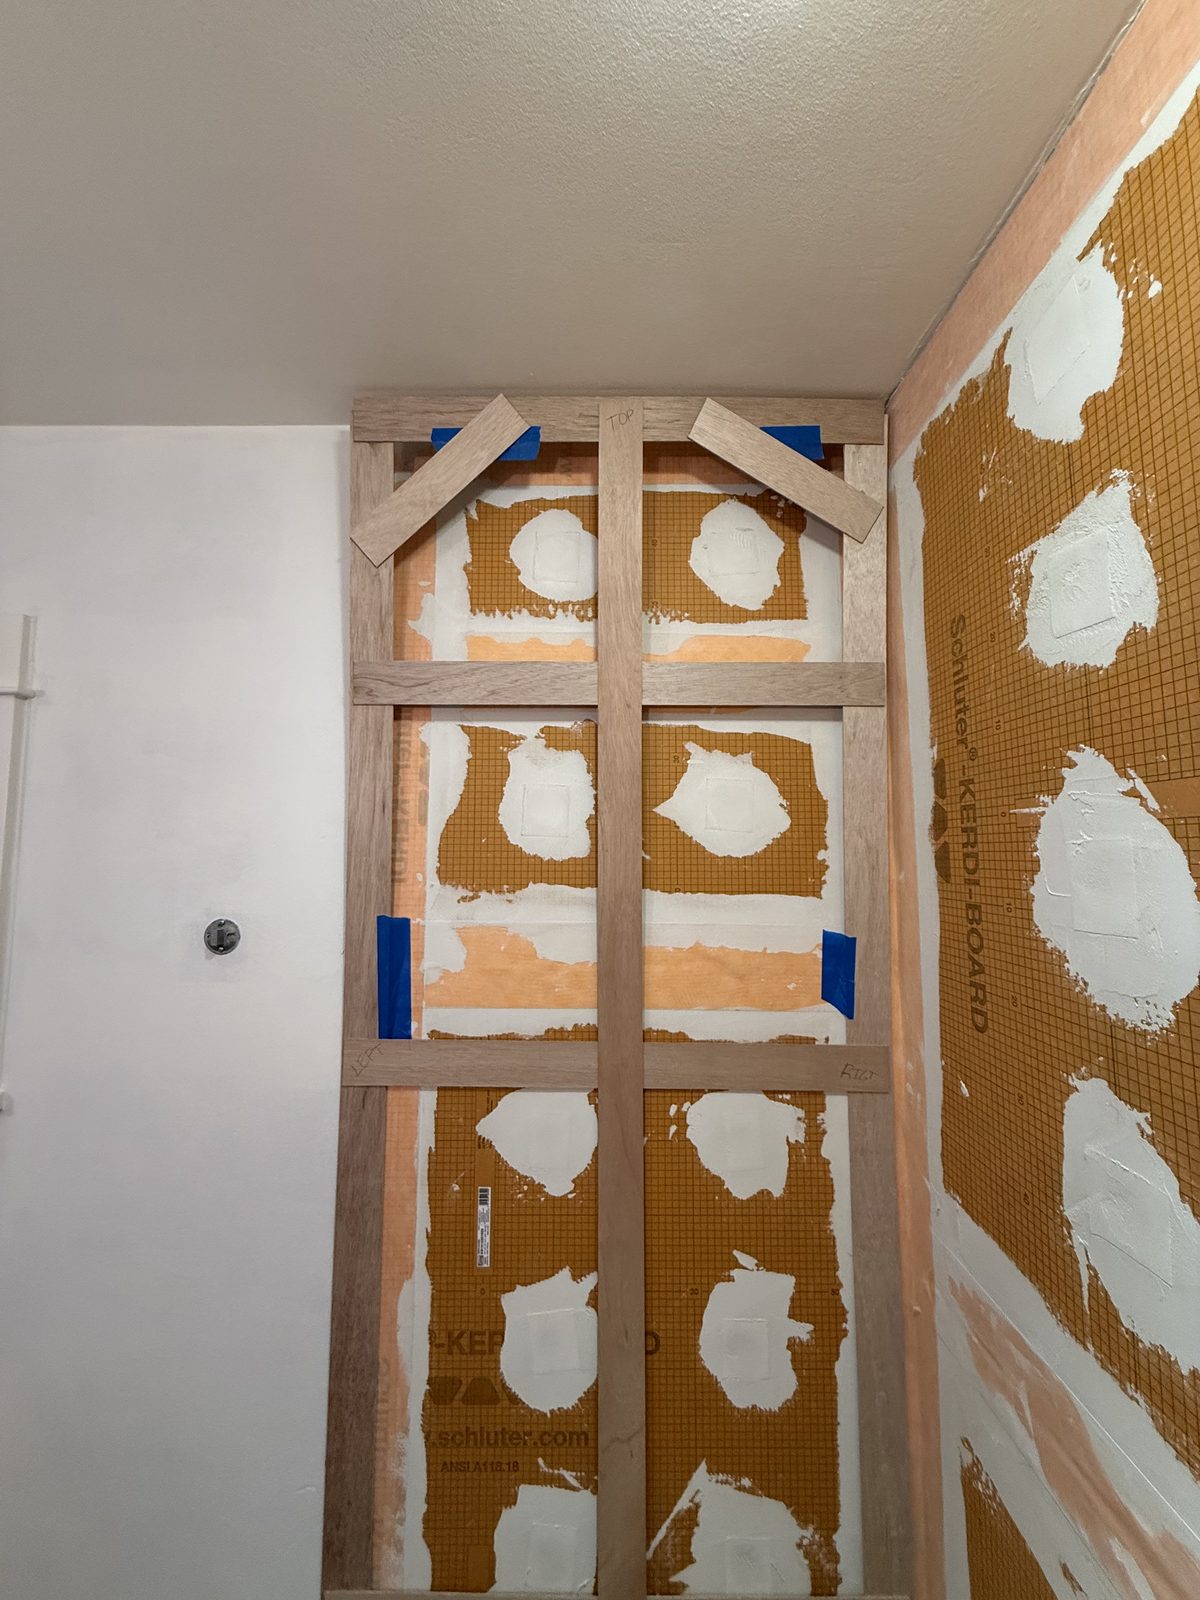
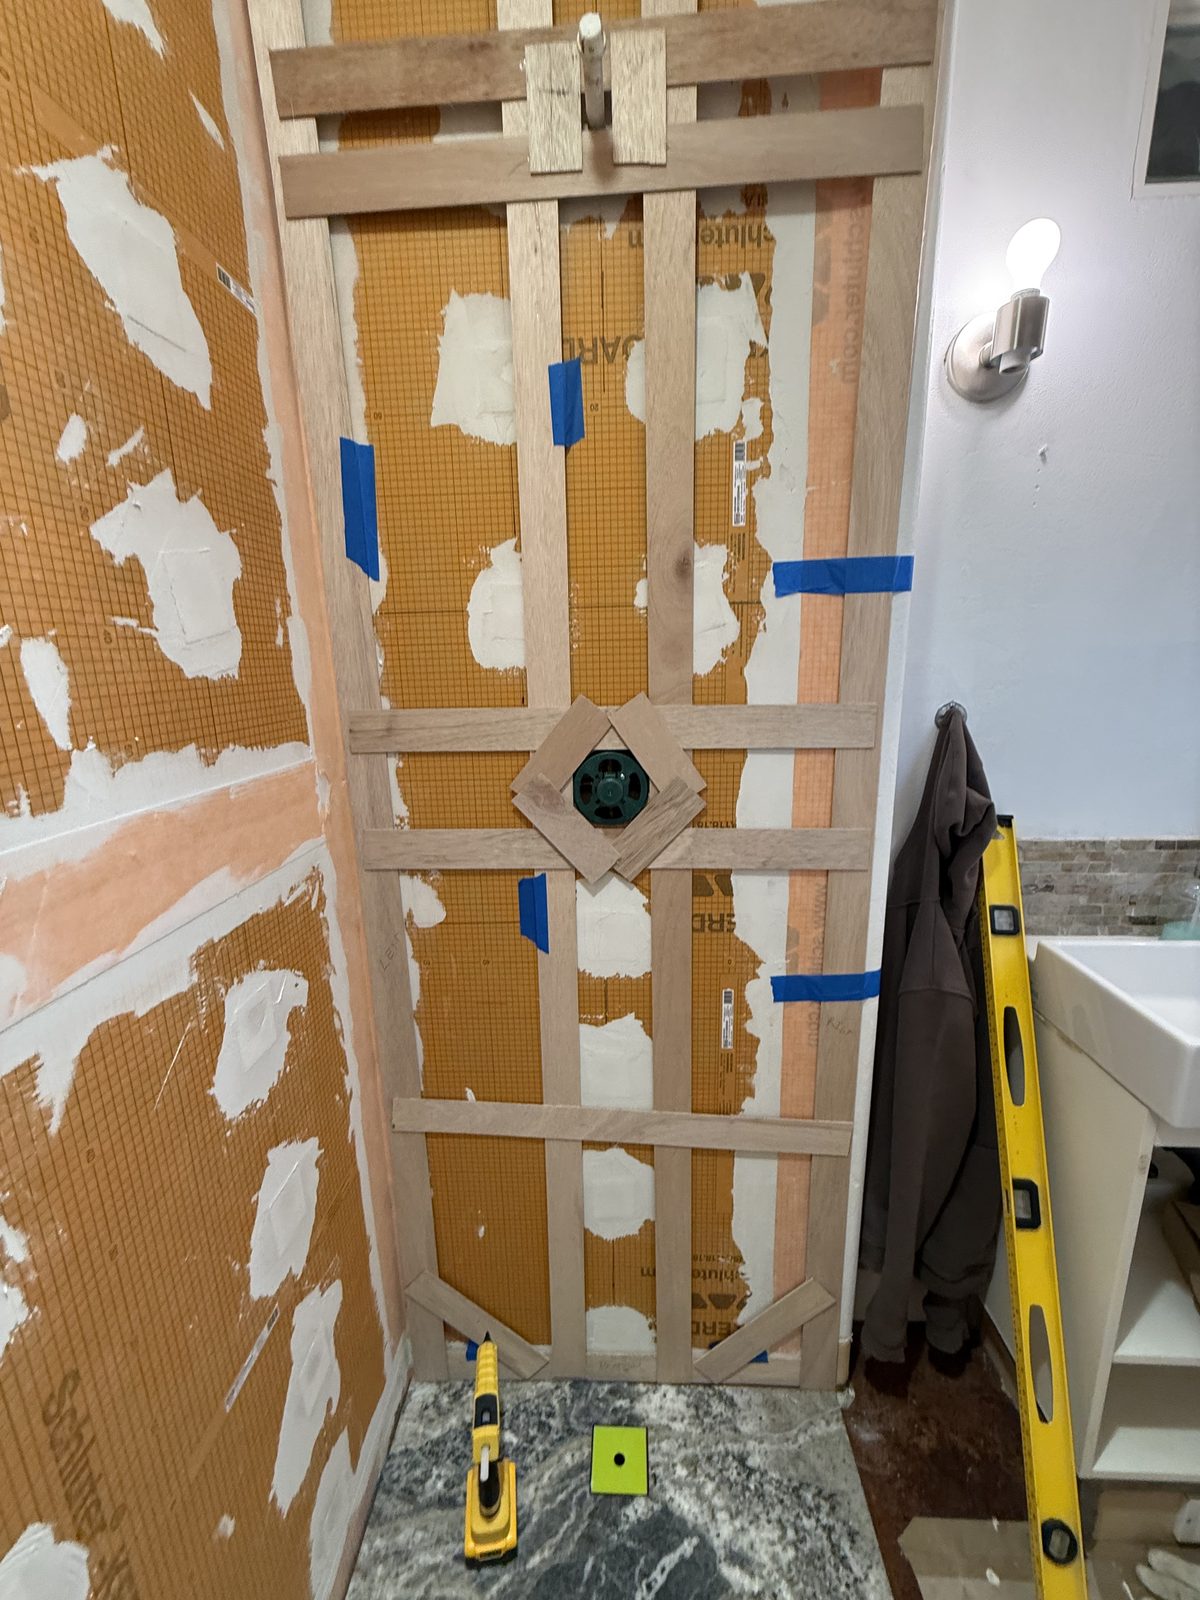
The walls templated over the installed base, marked so every panel goes back where it was measured. The valve opening is framed into the template, so the panel arrives cut to fit. 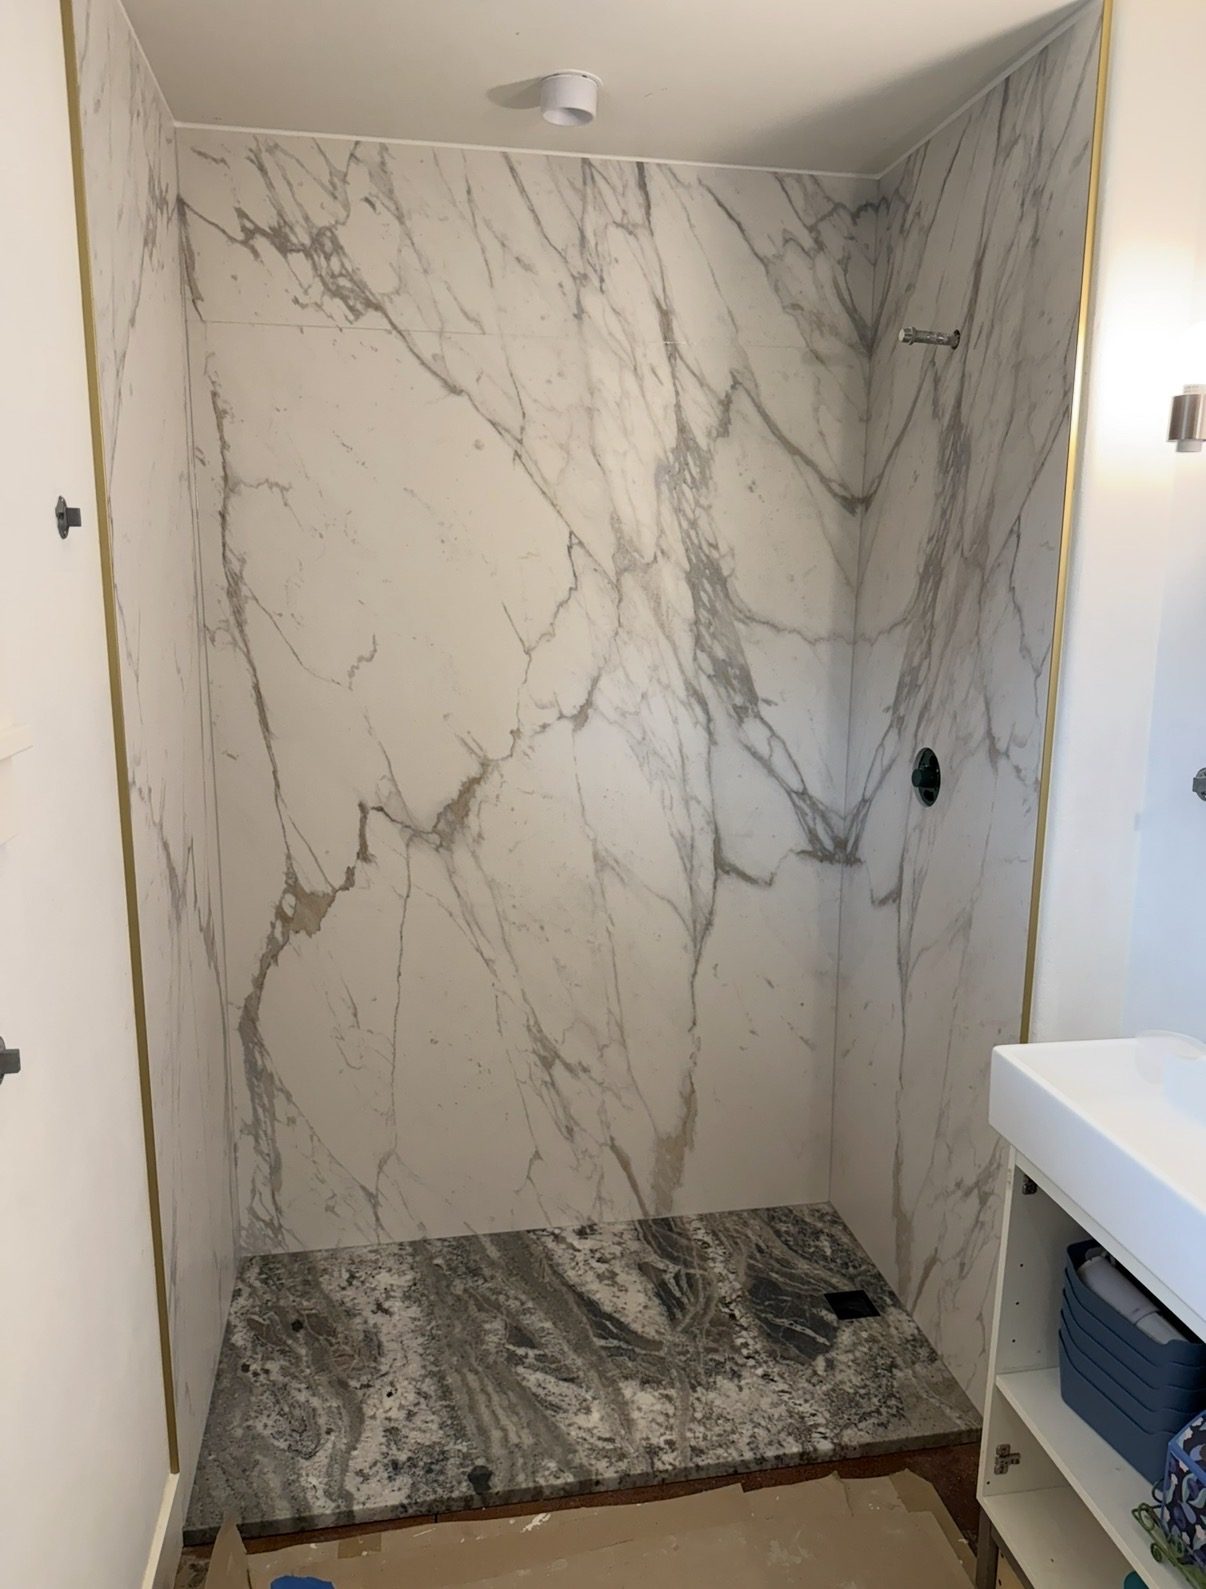
Wall panels installed over the base, before the glass. -
09
Shower glass door system
Day 14
- Template, fabricate, and install frameless shower glass panels.
- Hardware comes in the finish you choose: brushed nickel, chrome, gold, or matte black.
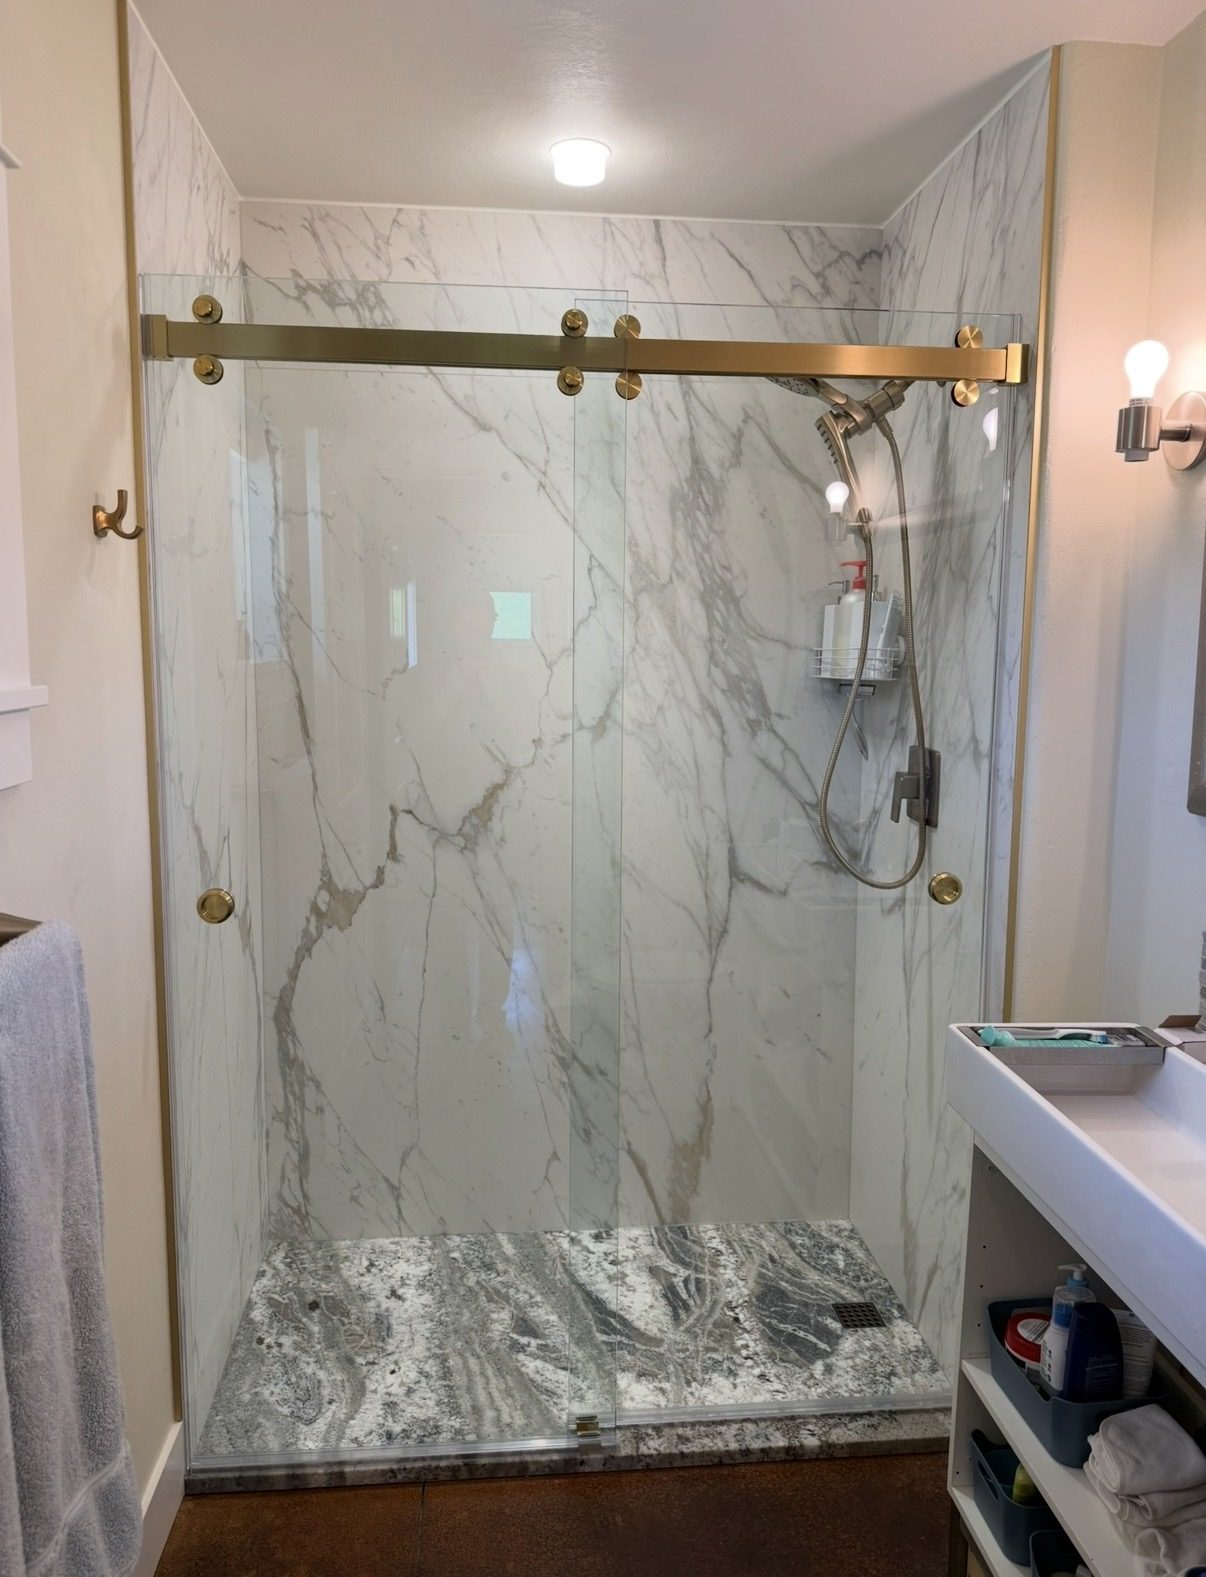
The finished shower, glass panels and hardware installed. -
10
Final finishing touches
Day 15
- Sheetrock patching and wall repair.
- Paint touch-ups and blending.
- Caulking as needed.
- Full job-site cleaning for a polished, ready-to-use shower.
What you are left with
Your new shower in custom stone, behind frameless glass, built on a waterproof system that was inspected before it was covered.
Thinking about your shower?
Tell us what you have and what you want. We will come take a look.
Get a free estimateor call or text 503-676-5136